Bike Repairs: New Shifters, Brakes, and Chain
Julian knocked over my bicycle trying to mount it (Haha--What was he thinking?) and one of the gear shifters broke, so I figured that I would take this opportunity to learn how to do several repairs/upgrades to my bicycle.
This bike is probably older than me. It belonged to my dad. I probably could afford to buy a new bike, but taking care of this one is important to me.
Disclaimer: I am a novice in terms of bicycle mechanics. I'm sure that my work could be done mindlessly by a lot of other people. I just like to log my accomplishments in my journal to give myself confidence and help myself remember for the next time I have to do something similar.
Vocab List #1: The Drivetrain
One of my greatest challenges with mechanics is learning the vocabulary. If I don't know what the words mean in the instruction manual, or that the mechanic at the shop uses, to explain instructions or a process, then I am never going to understand the message. So, here is today's first vocabulary list:
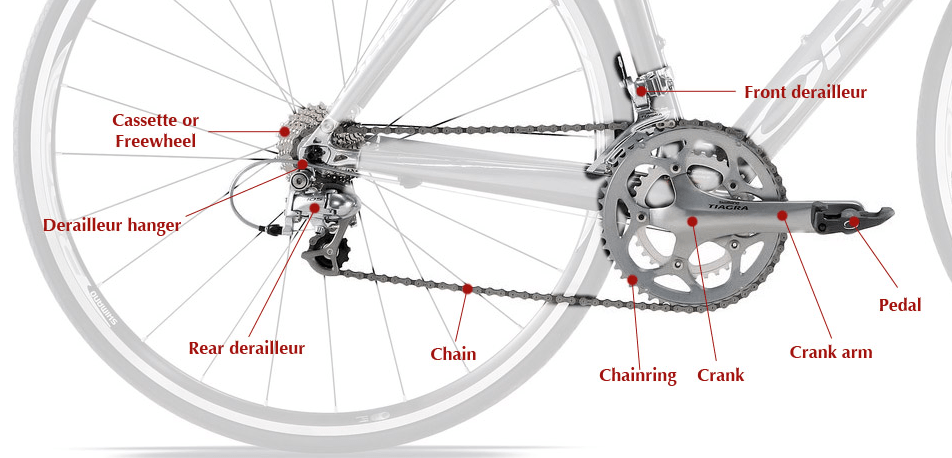
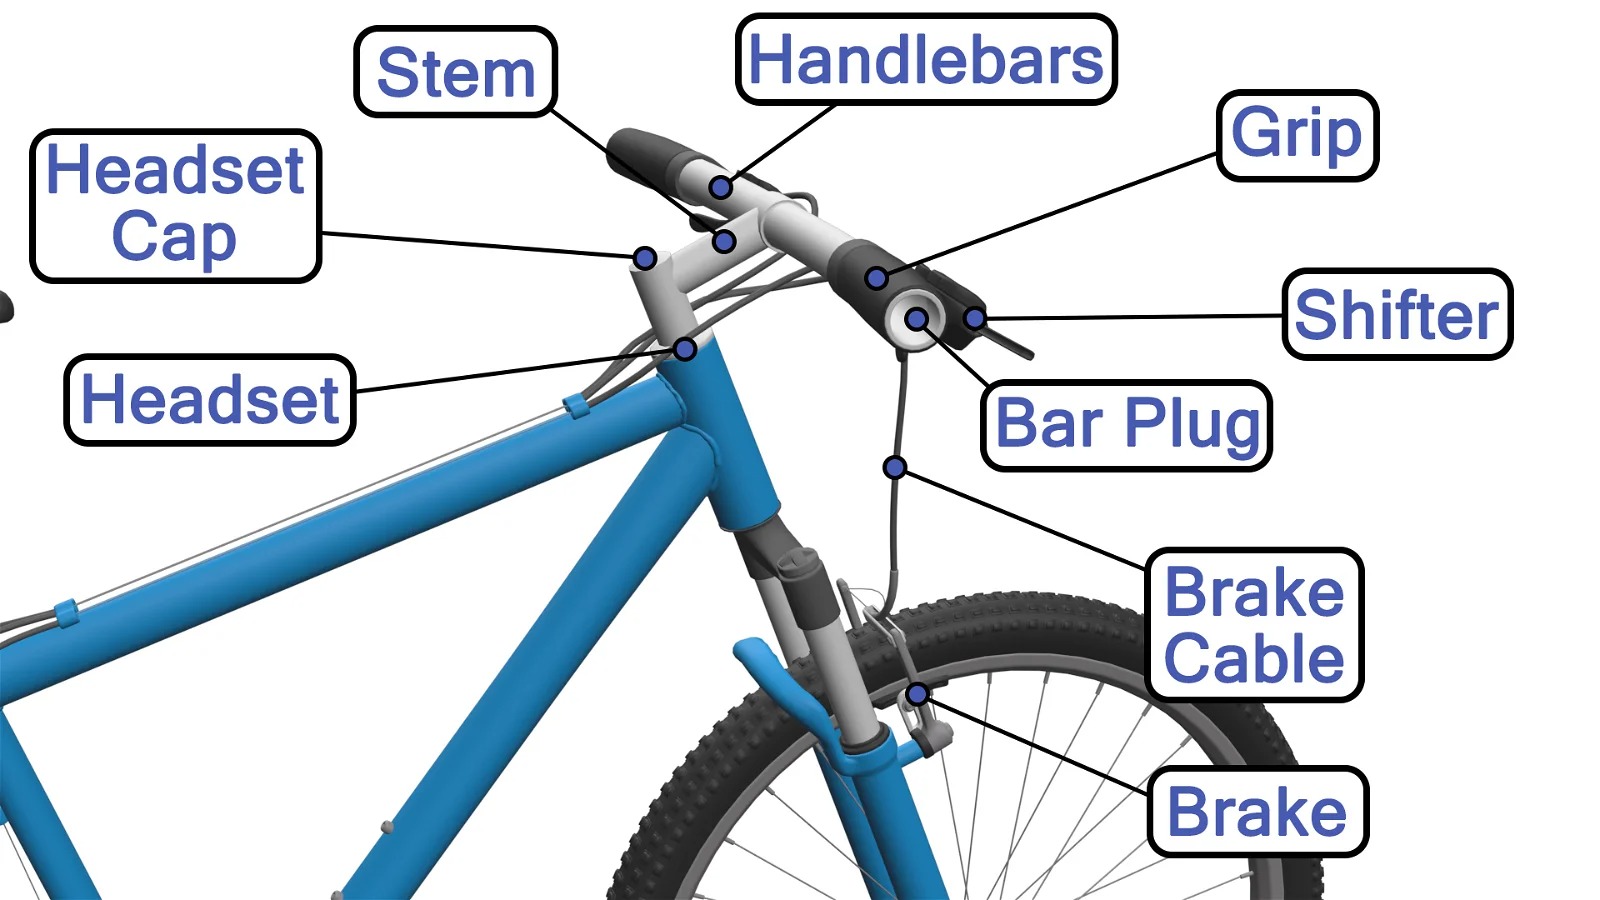
Here is a picture that labels some of the drivetrain parts that can be difficult to understand without a visual:
Twist grip vs. Trigger shifters
Let's start with the gear shifters. There are different types.
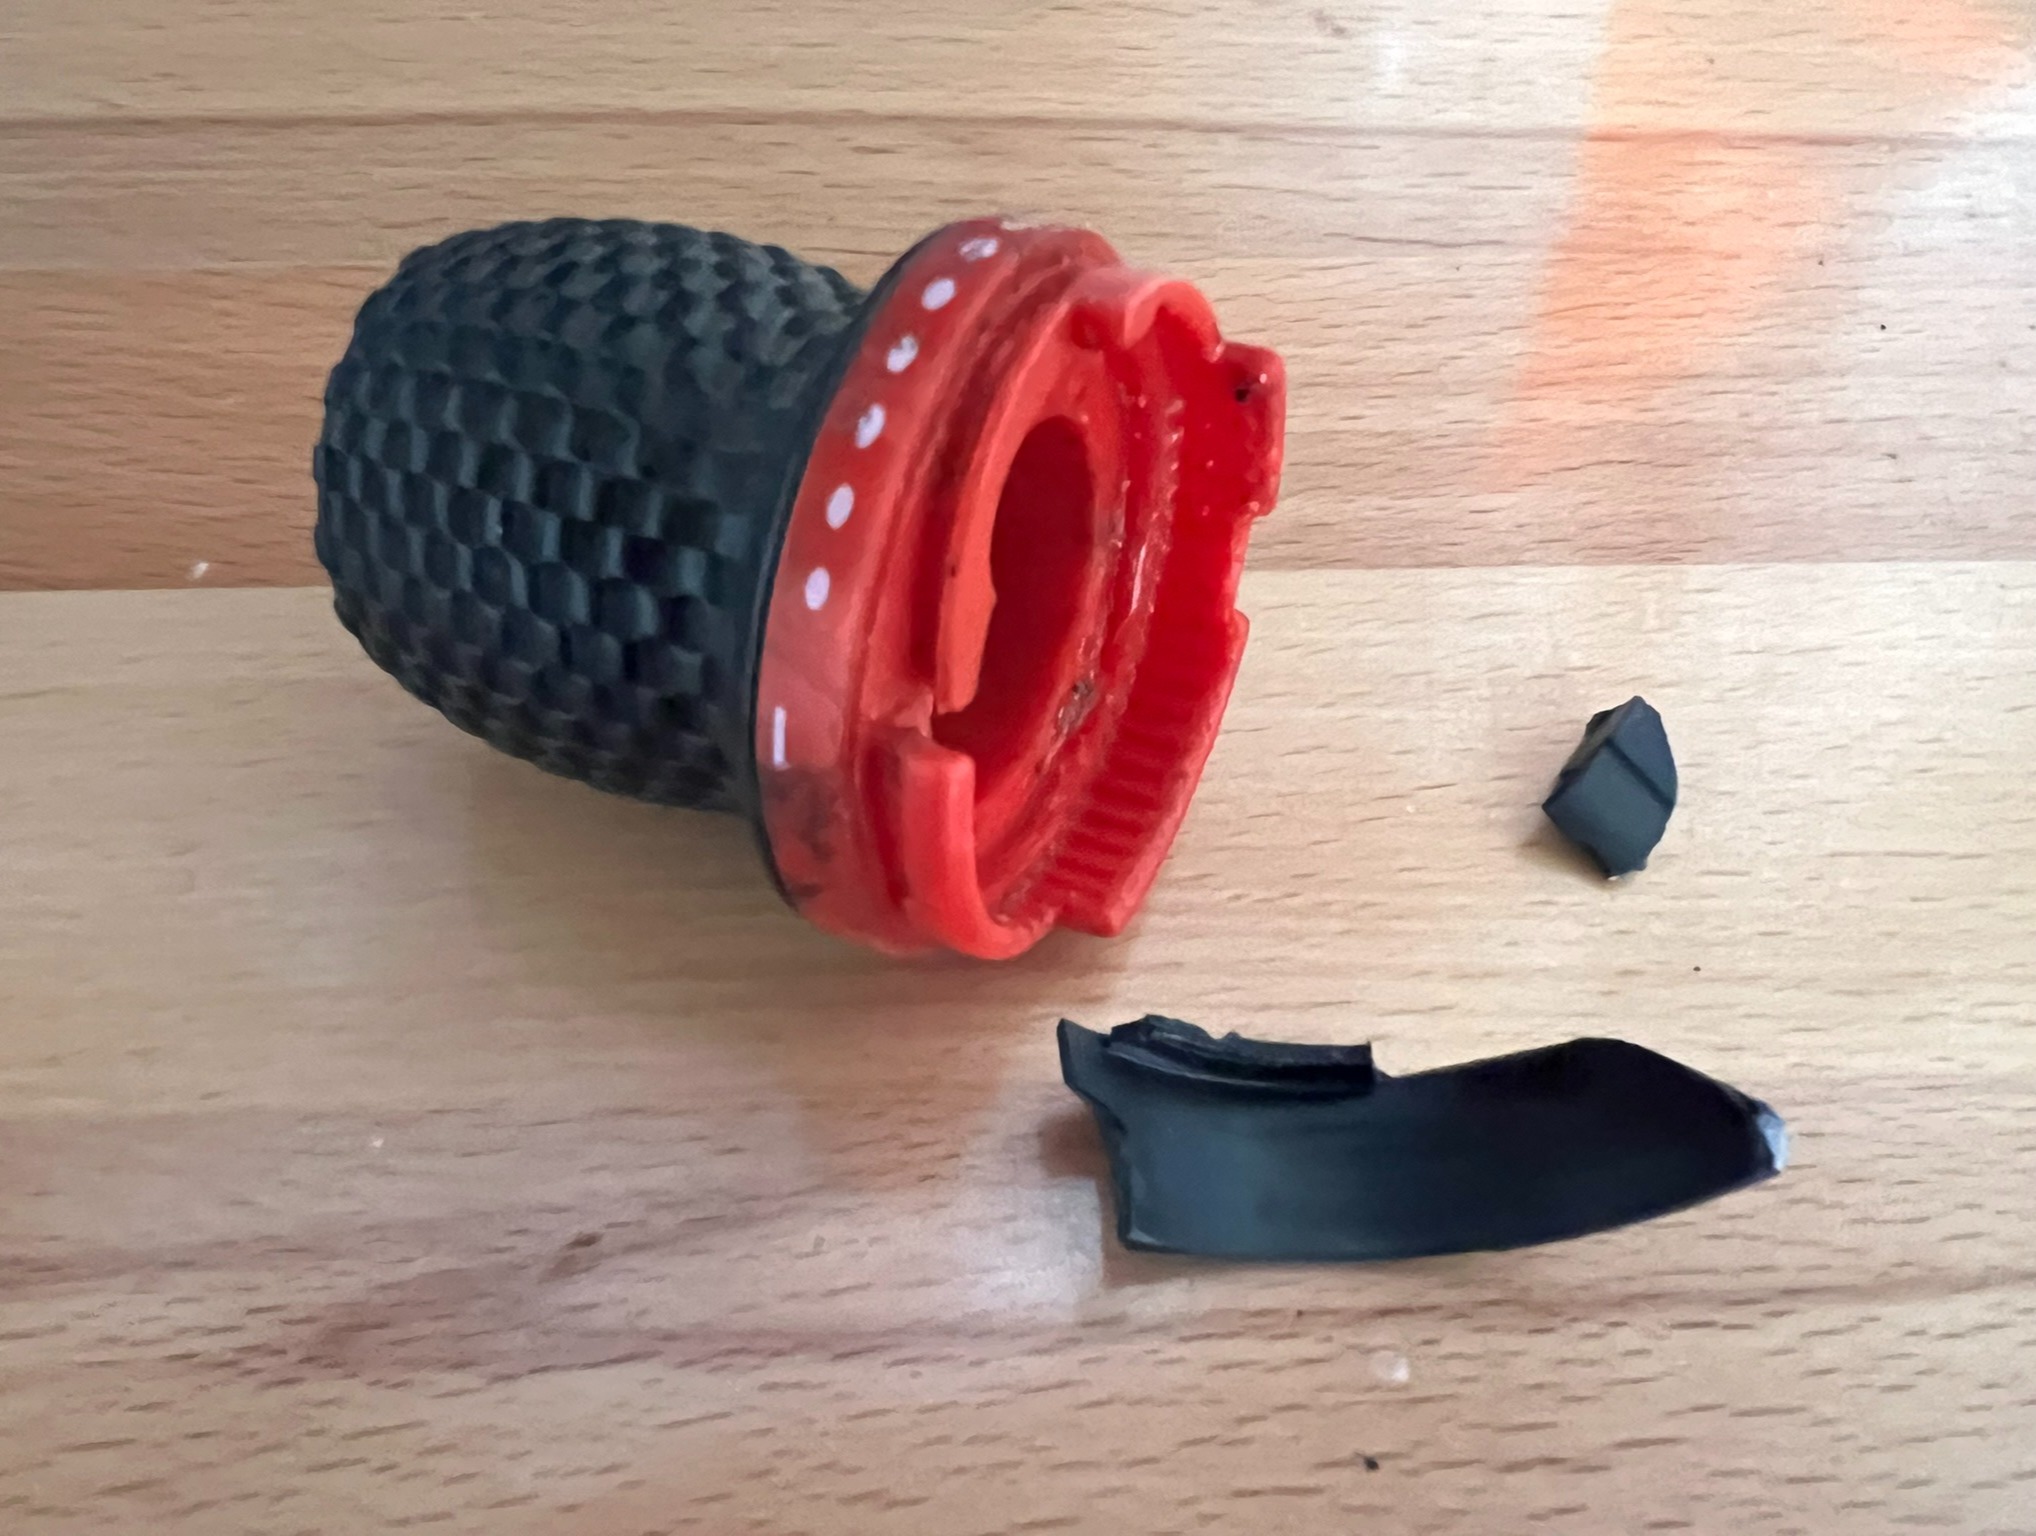
My bike had twist grip shifters on it. A mechanic had put them on 10-15 years ago for me. One of these shifters was what broke when the bike fell. You can see it (the broken one) in the first picture of this post. You twist the black, textured grip forward or backward based on how you want to shift gears and the red dial moves along with it to tell you which gear you are using.
I had been wanting to change these out for trigger shifters for a while anyway. The twist grips had always seemed cheap to me and I was more accustomed to trigger shifters.
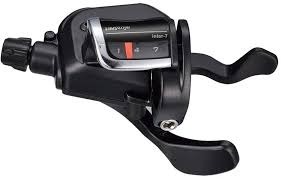
The picture below shows a trigger shifter. You push the knob/trigger forward or pull it backward to shift up or down.
Match new shifters with existing derailleur and speed
Another thing that can be tricky about bicycle mechanics is identifying the correct part for your specific bicycle. Just as with a car, sometimes a new part can be any generic part, sometimes the part has to be a specific brand and size, and sometimes the part could be made by a variety of brands as long as the size fits. It's like, in my car, I could probably buy and install almost any type and size of cell phone holder on my dashboard; if I need new tires, I have to select the correct size to fit my car, but have flexibility in the brand that I choose; but if I need a new engine, I have to buy the exact engine that matches the make and model of my car. On a bicycle, new gear shifters must match the exact speed (number of gears in the back) of my existing bicycle and the exact brand of the existing derailleur.
The speed match is obvious--In order to be able to shift into each speed, the control (the hand-operated shifters) must match in number. The brand match necessity I hadn't realized until now. Different brands have designed their shifters to pull or release the cable that connects the shifters with the derailleur different distances with each click/shift. If I would have bought shifters made by a brand that was different than the existing derailleur on my bicycle, the shifters wouldn't accurately move the derailleur the distance needed to shift from one gear to another on the chainring and cassette.
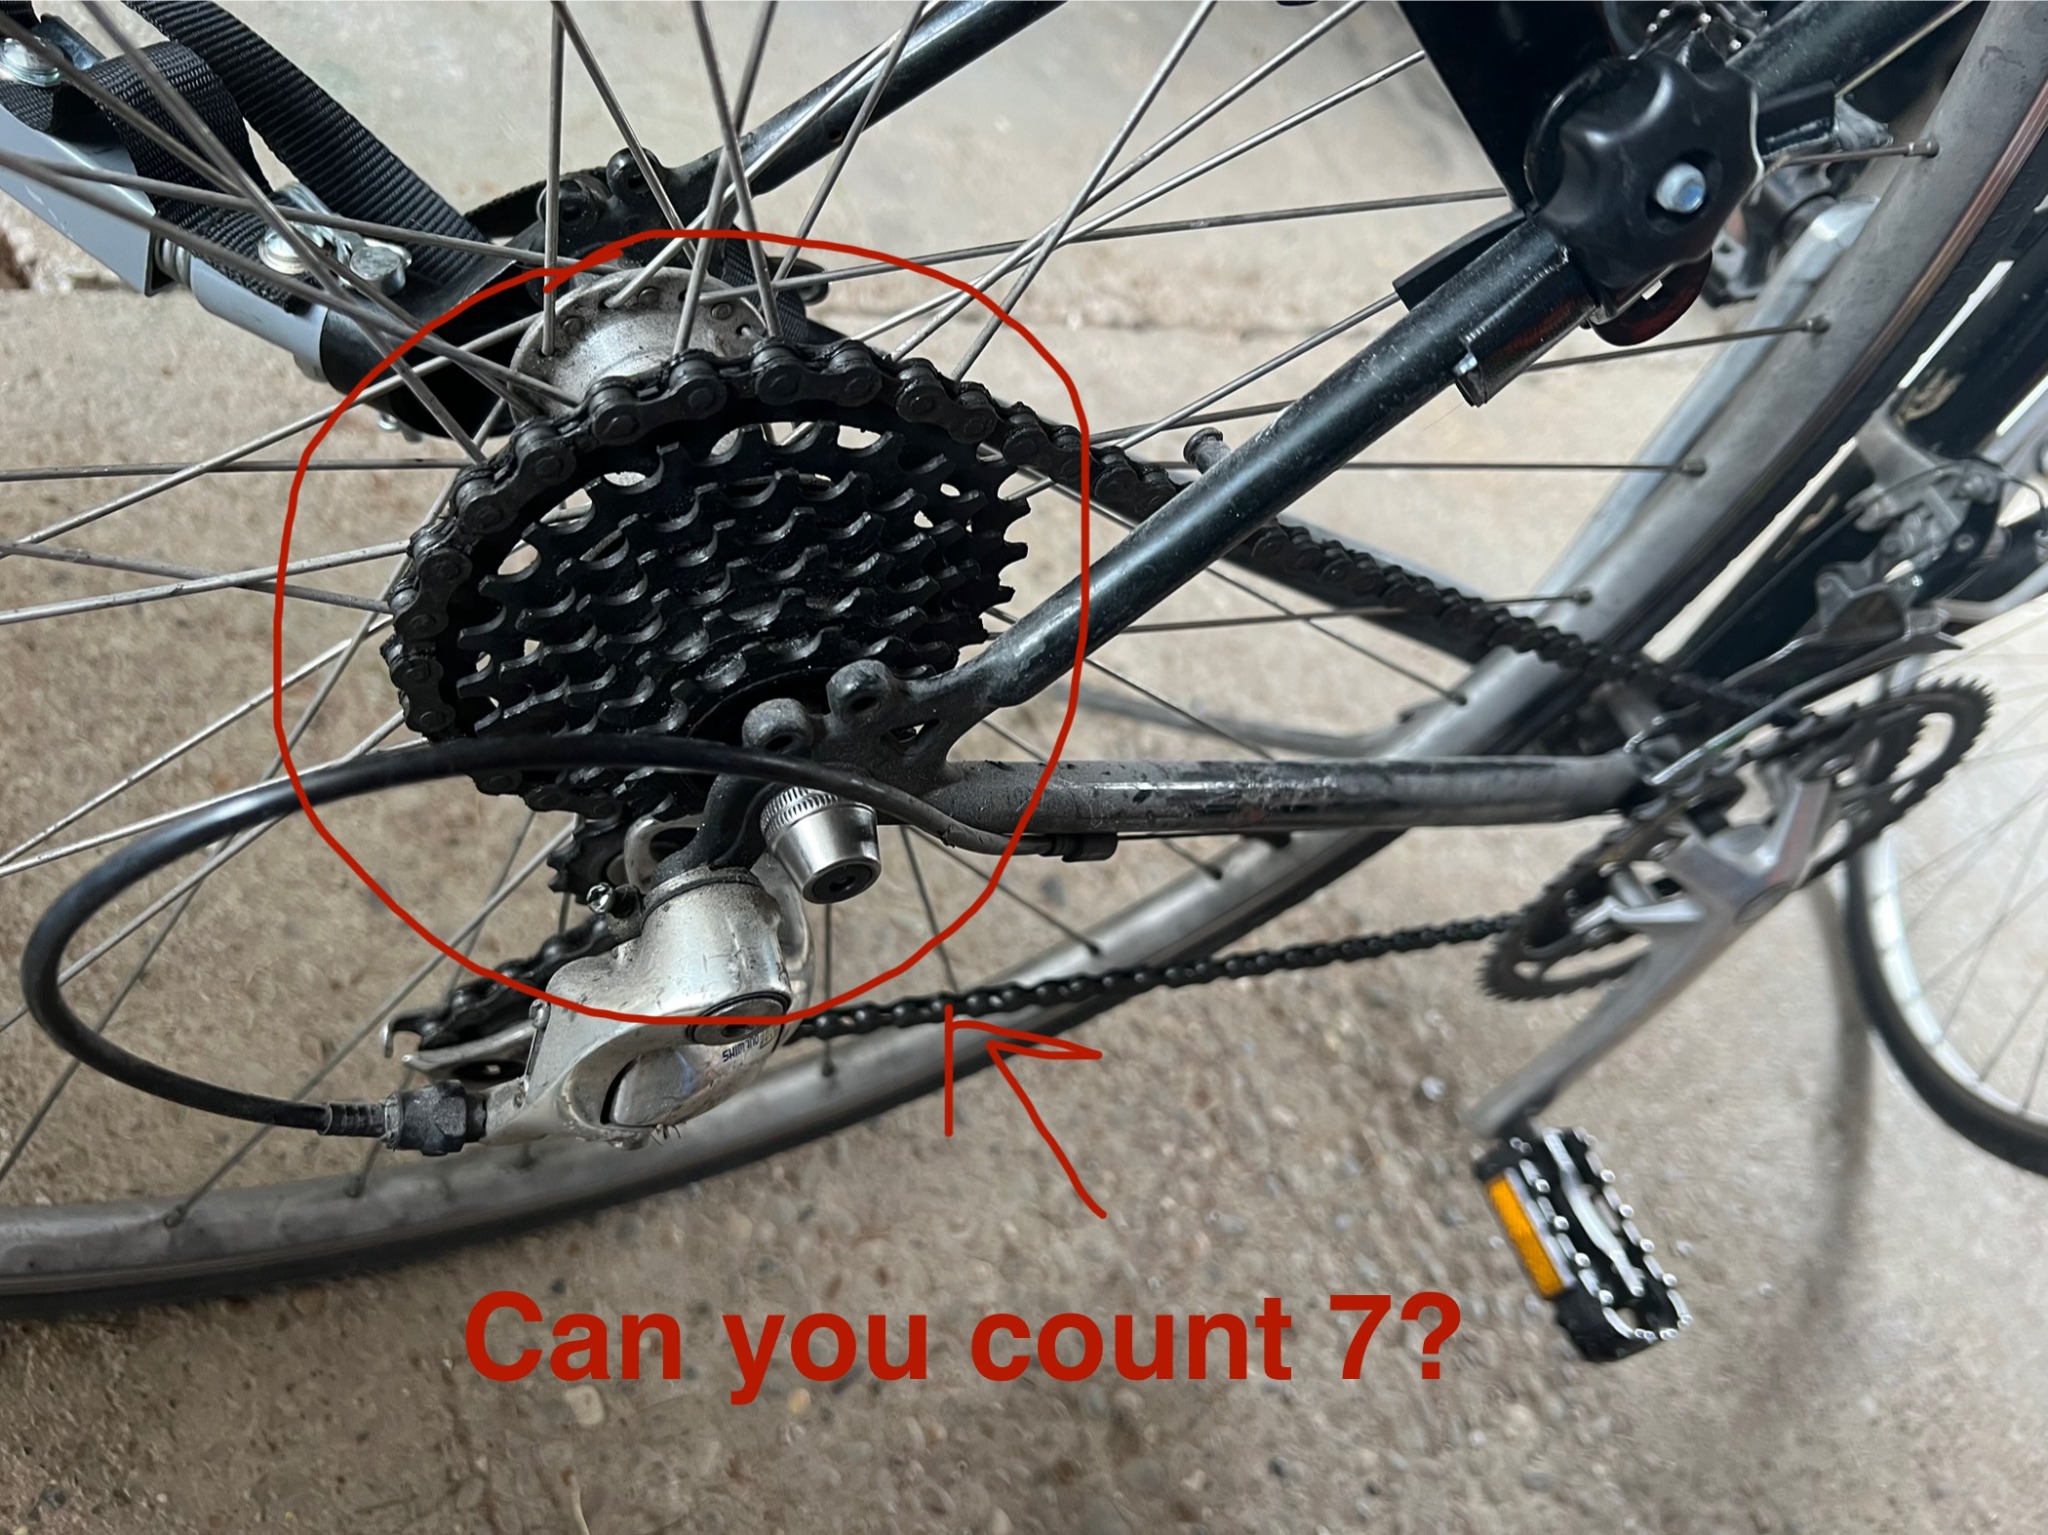
First, I found that my bicycle has 21 speeds. To identify this number, you count the number of speeds (the number of cogs/sprockets) on the rear cassette and front chainring, and multiply these numbers together. I have seven cogs on my rear cassette times three cogs on my front chainring, which equals 21 total speeds for my bike.
Second, I found that my drivetrain system is a "Shimano." At this point, I learned that Shimano is a Japanese company that is one of the biggest names in the cycling world. Shimano makes more than half of the world's bicycle components.
Check the brake system style
Different bicycles may use different styles of brake systems. There are rim brakes, mechanical disc brakes, and hydraulic brakes. My bicycle used rim brakes. They are very simple. The hand brake pulls a cable that then pulls the brake arms, which squeezes brake shoes and pads onto either side of the bicycle wheel rim, thus stopping the wheel and bringing the bicycle to a halt. Replacement parts for this style of brake system don’t have to be a specific make or model—Almost any will work.
So, in the end, I needed Shimano shift/brake lever combo units that would fit a 21-speed bike.
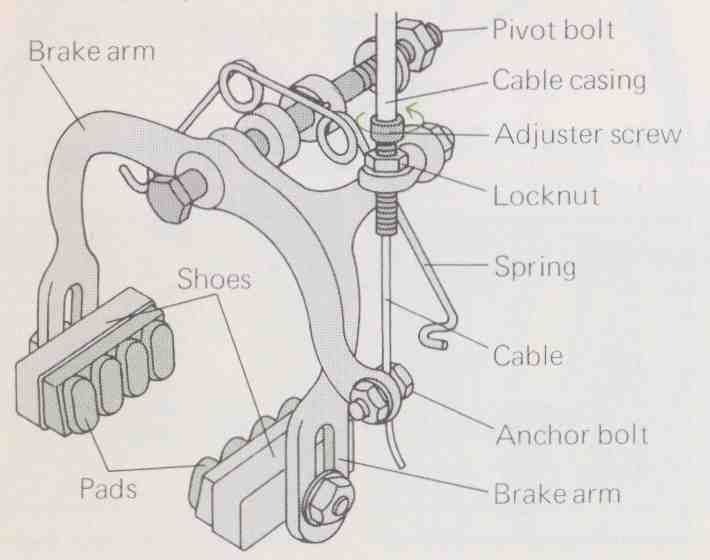
Vocab List #2: Rim Brake System
I think pictures with labels are good enough here!
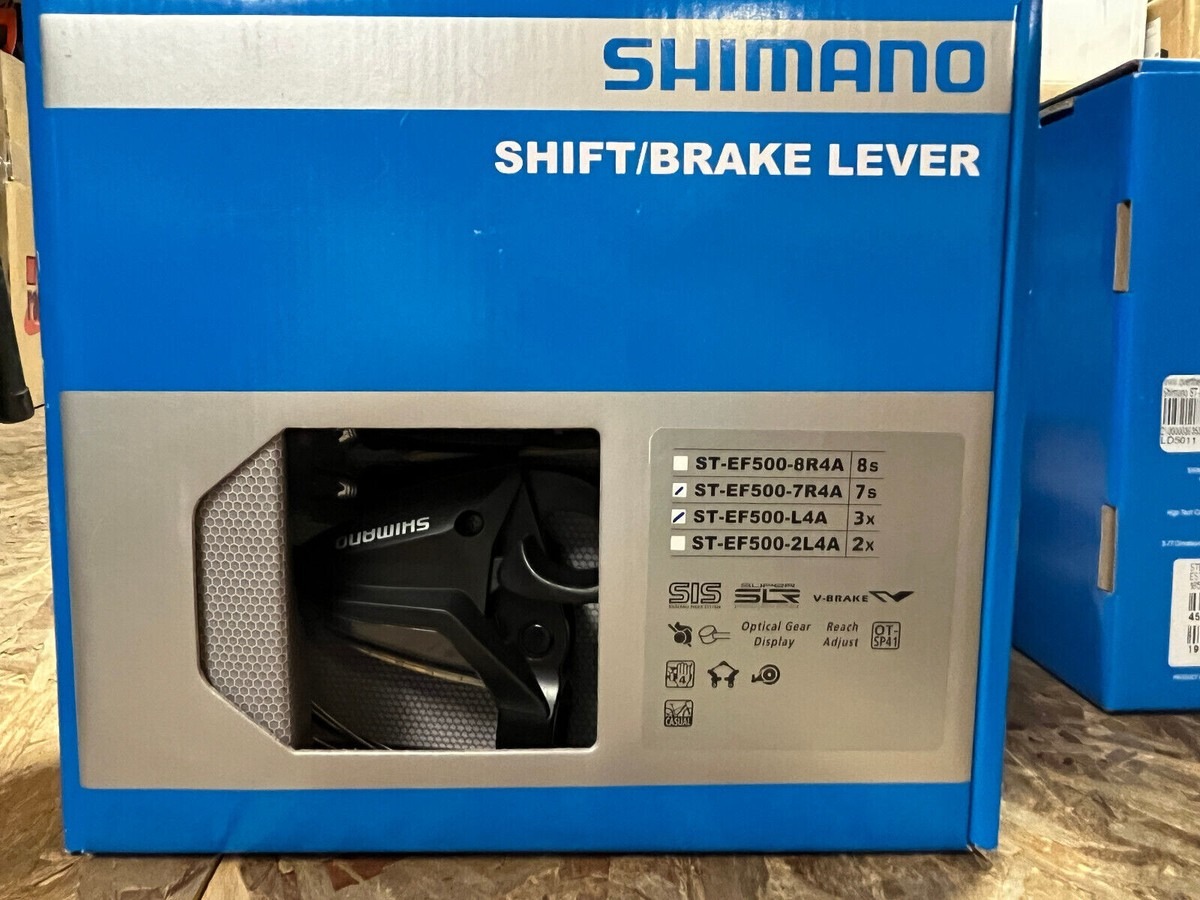
Shimano ST-EF500-7R4A & ST-EF500-L4A
These are the model numbers of the shift/brake lever combo units that the mechanic at PRO Bike+ South Hills helped me find for my project. Here is what the labels mean:
- ST = "Shift/brake lever" (one integrated unit with both functions)
- EF500 = The specific series/model. EF500 is an entry-level Shimano "EZ-Fire Plus" integrated brake/shift lever set, common on recreational MTBs and hybrids.
- 7R4A = Right-hand unit for a 7-speed rear derailleur
- L4A = Left-hand unit, typically for triple (3x) front chainrings.
Replacing the brakes and shifters
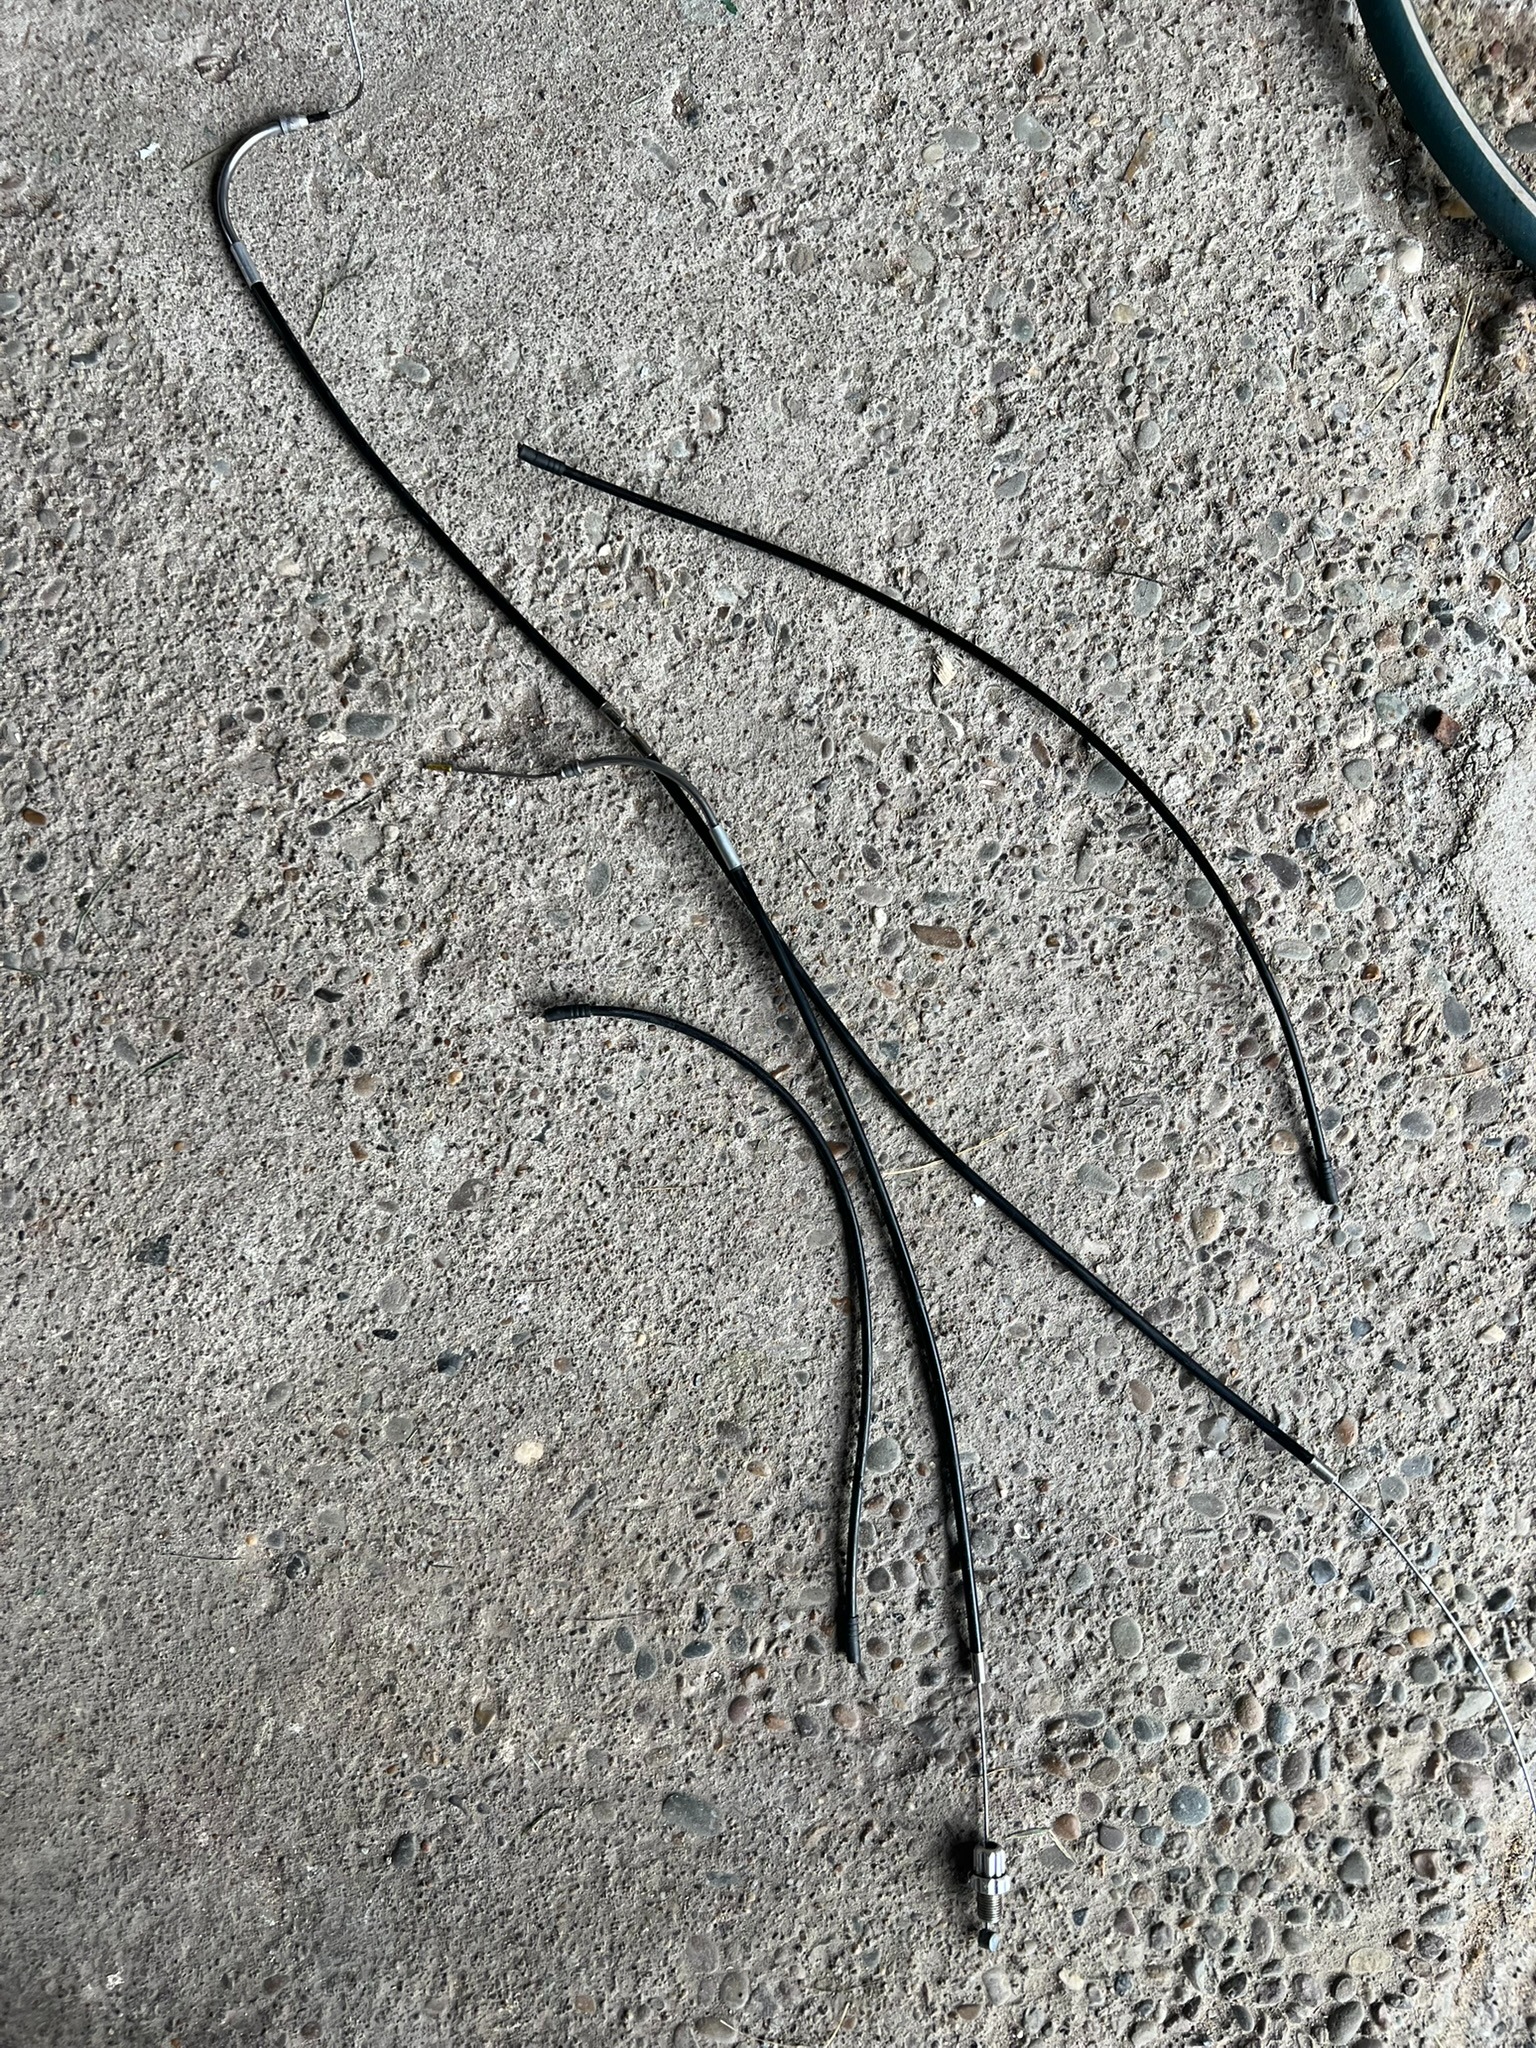
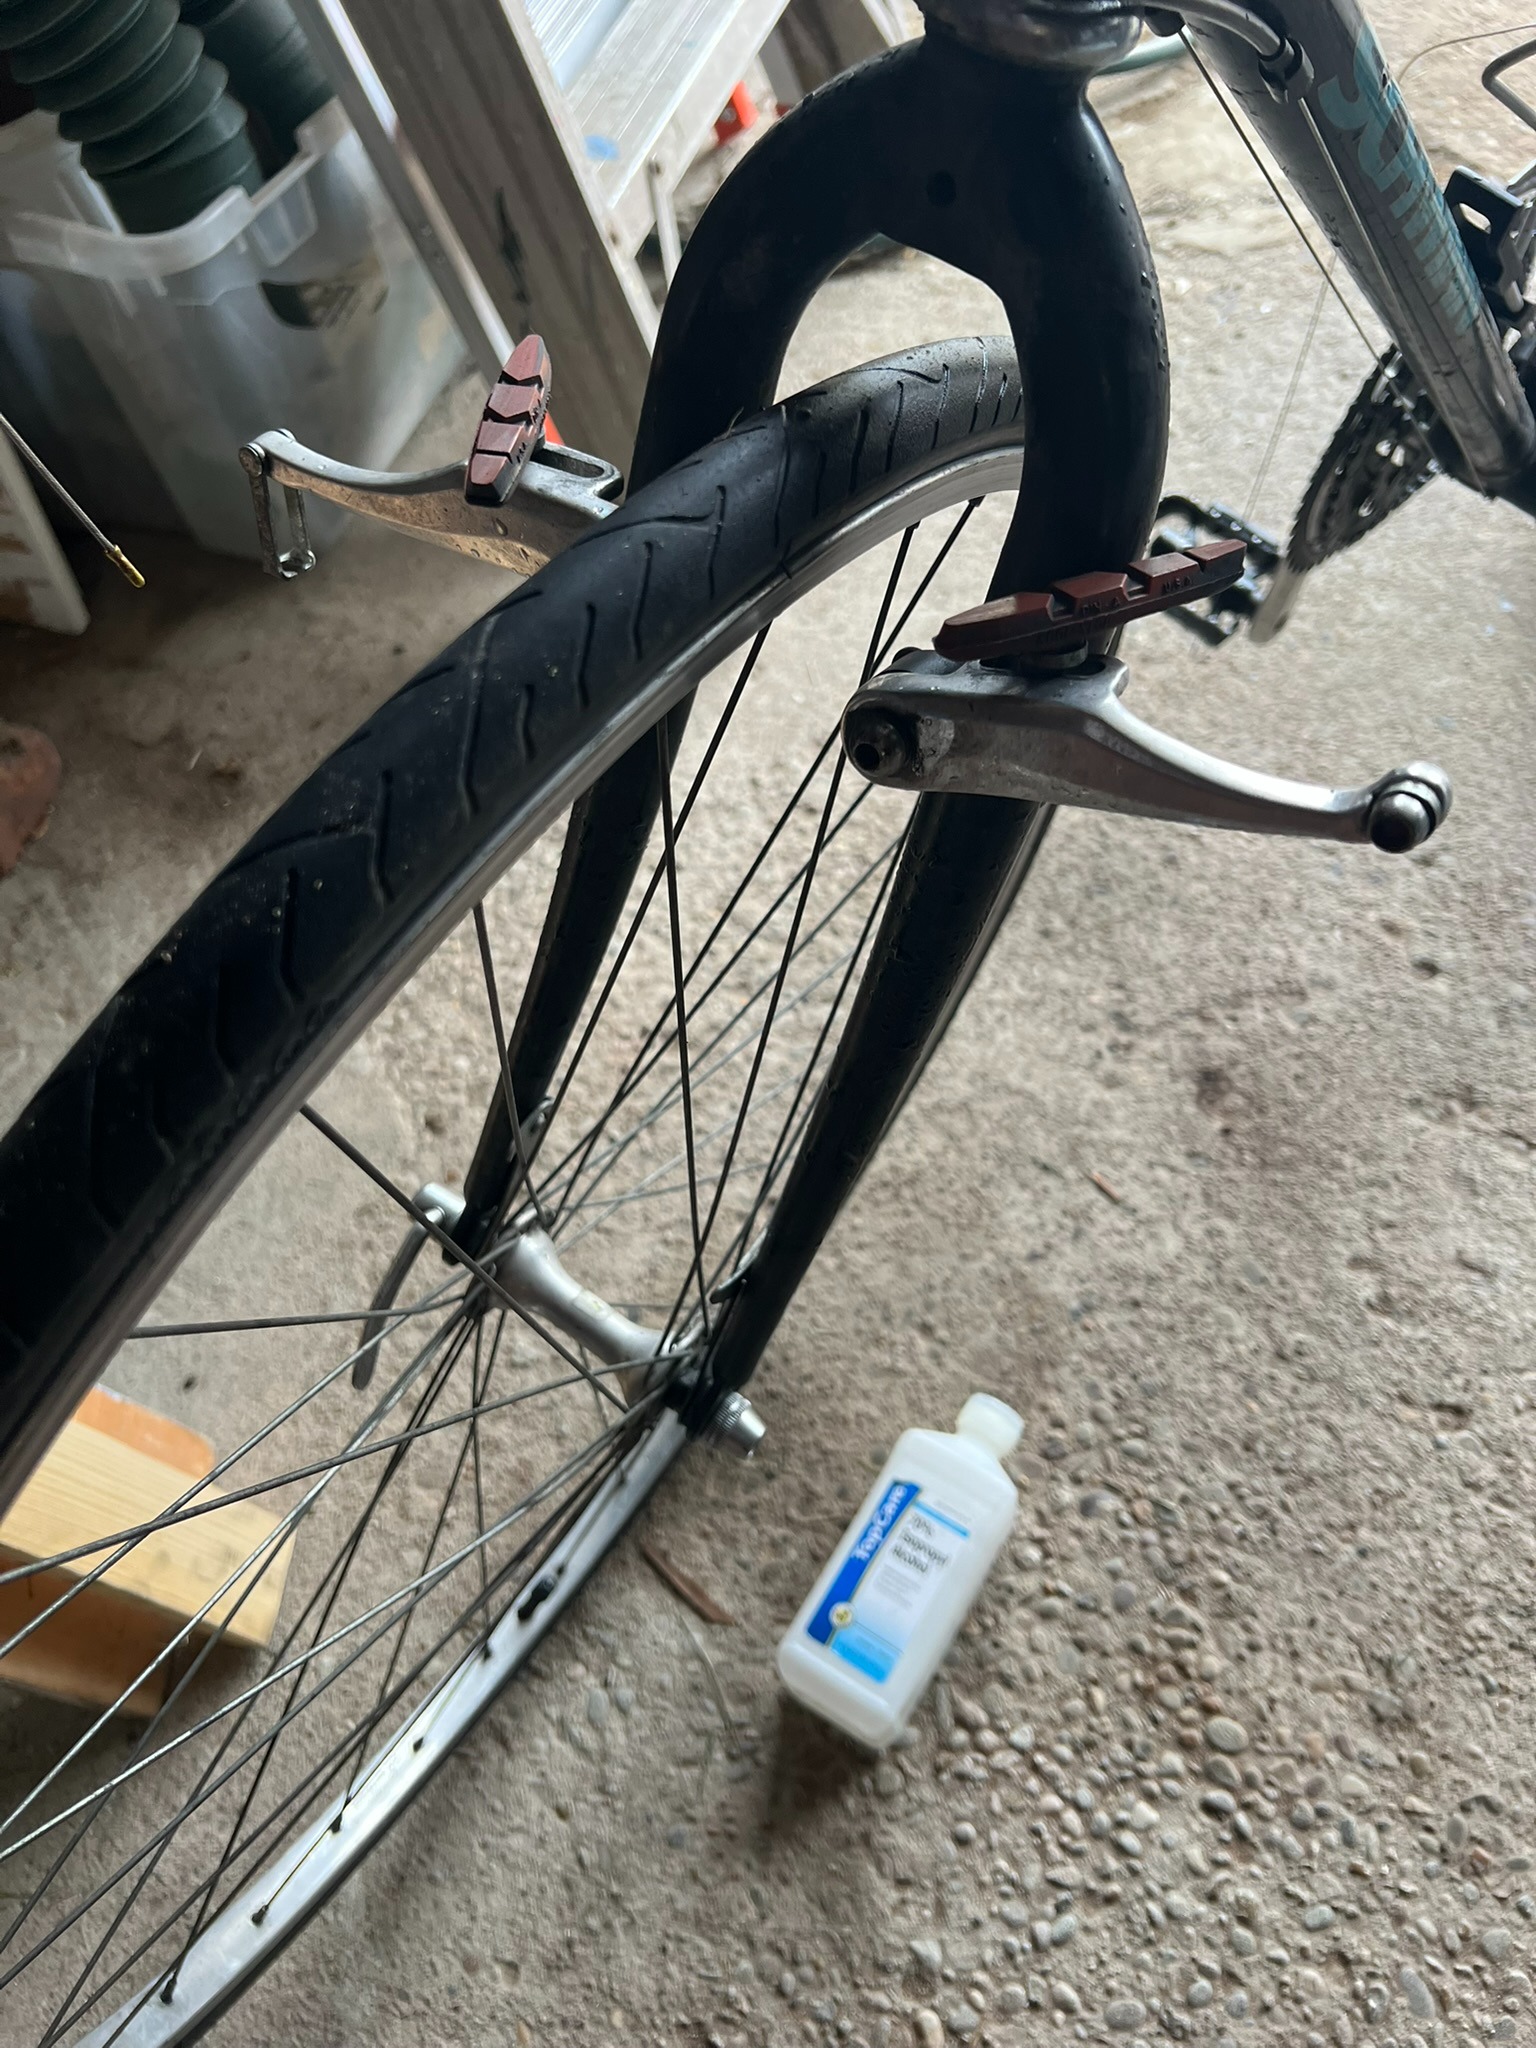
First, take a picture or video of the bicycle that allows you to see how the brake and shifting systems are currently installed so that you can use it as a reference point when installing the new parts. There are four lines total, so it could be confusing how to best route each one to its destination when they are all off.
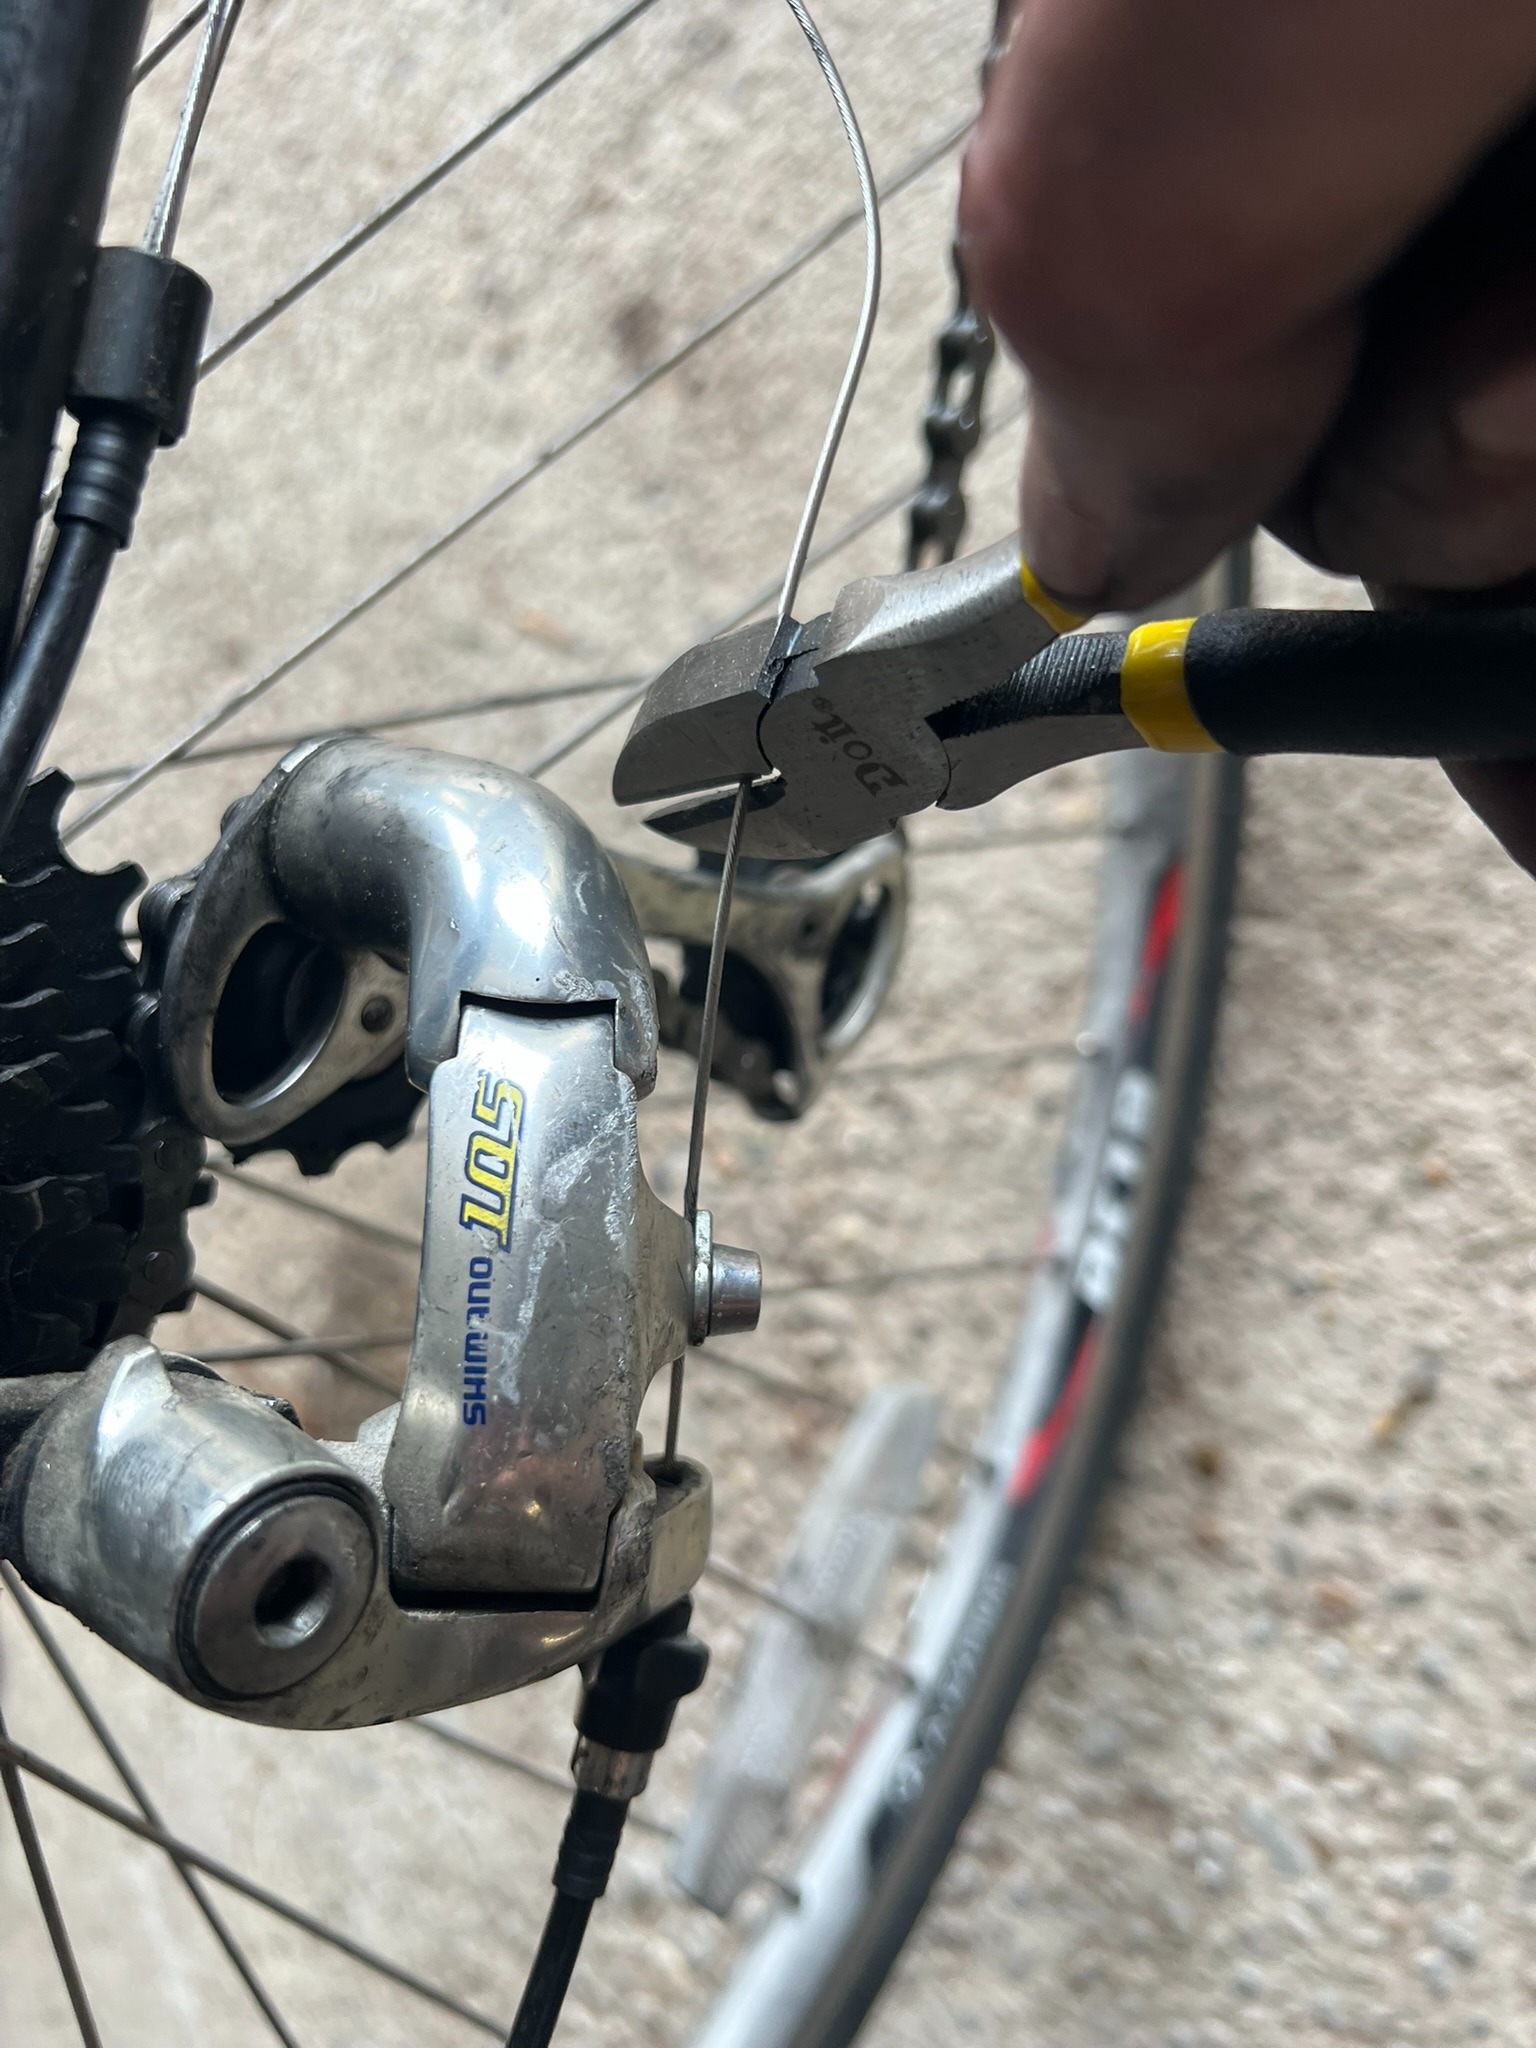
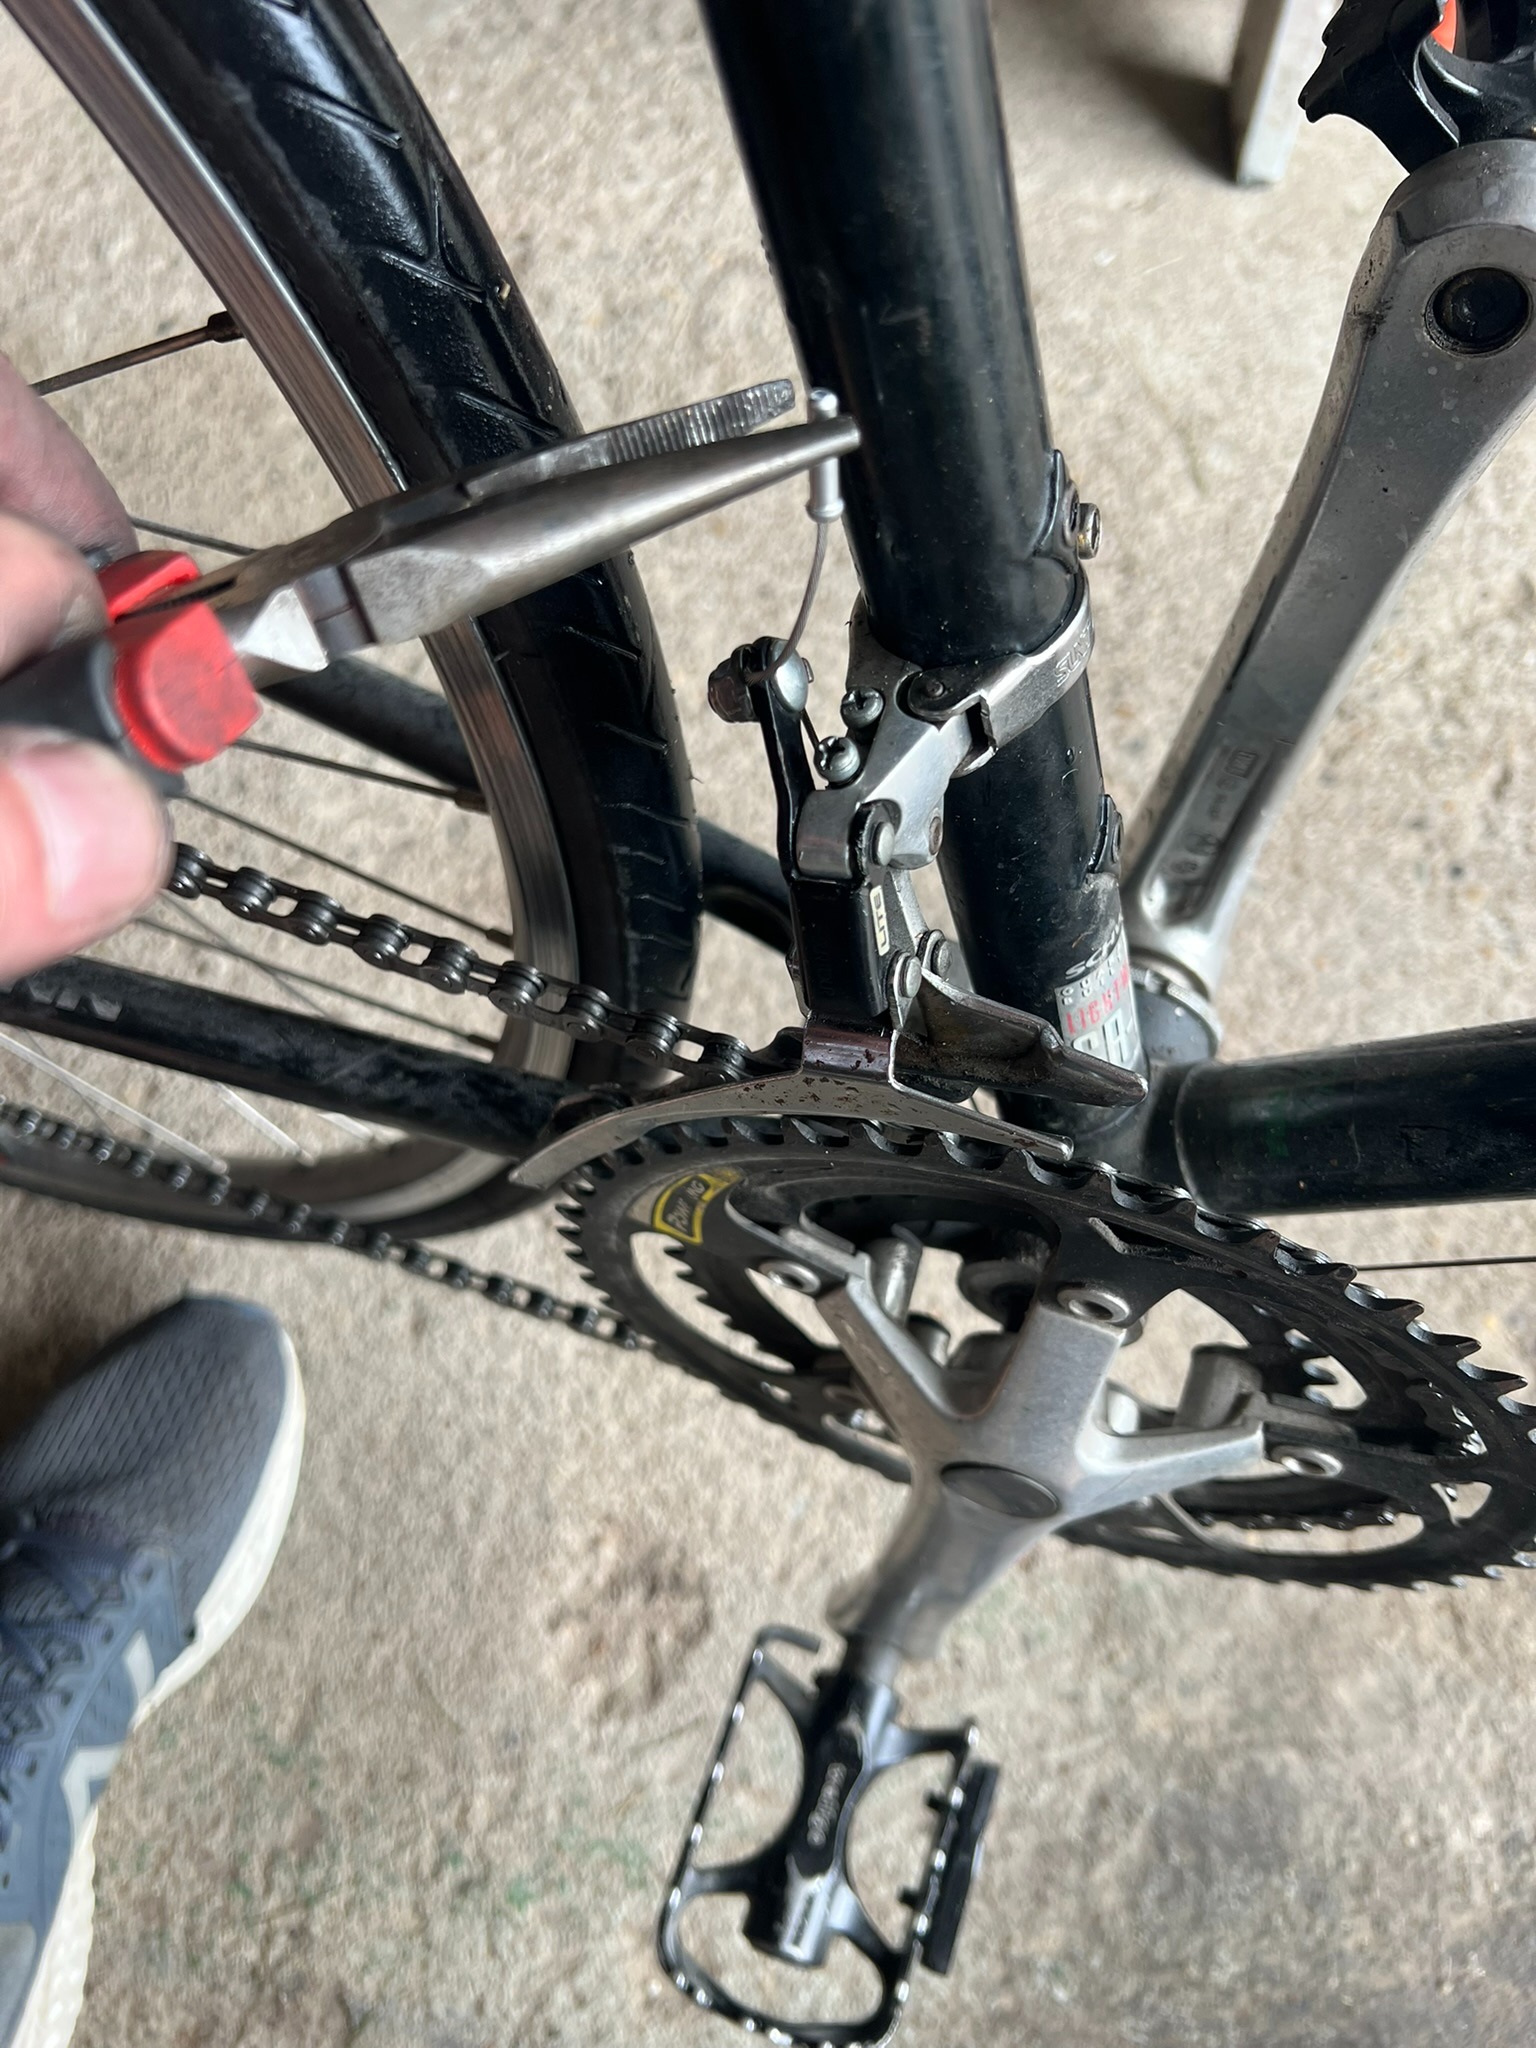
Second, remove the existing parts that you need to replace--For me, the existing shift/brake lever units, the cables, and the housing. I had to unscrew the units, release the clamps that held the lines in place at each wheel, cut the lines with wire cutters, and remove the housing by hand.
Tip: Keep the housing pieces. Each of my cables were protected with multiple small pieces of housing at various locations (rather than being covered entirely). The Shimano shift/brake kit that I bought came with long strips of housing, but I would have to cut them into smaller pieces to fit the various sections of cable that were meant to be protected. So, if the existing pieces of housing are in tact and I keep them, I could either reuse them, or easily use them side-by-side with the new housing strips to make sure that I cut the new housing pieces into appropriate lengths.
Third, install the new system components, referencing your picture or video to make sure that you are running the new lines the correct way.
Fourth, cut excess length from the cables, put an end cap or crimp on exposed ends, and crimp it with a pair of pliers.
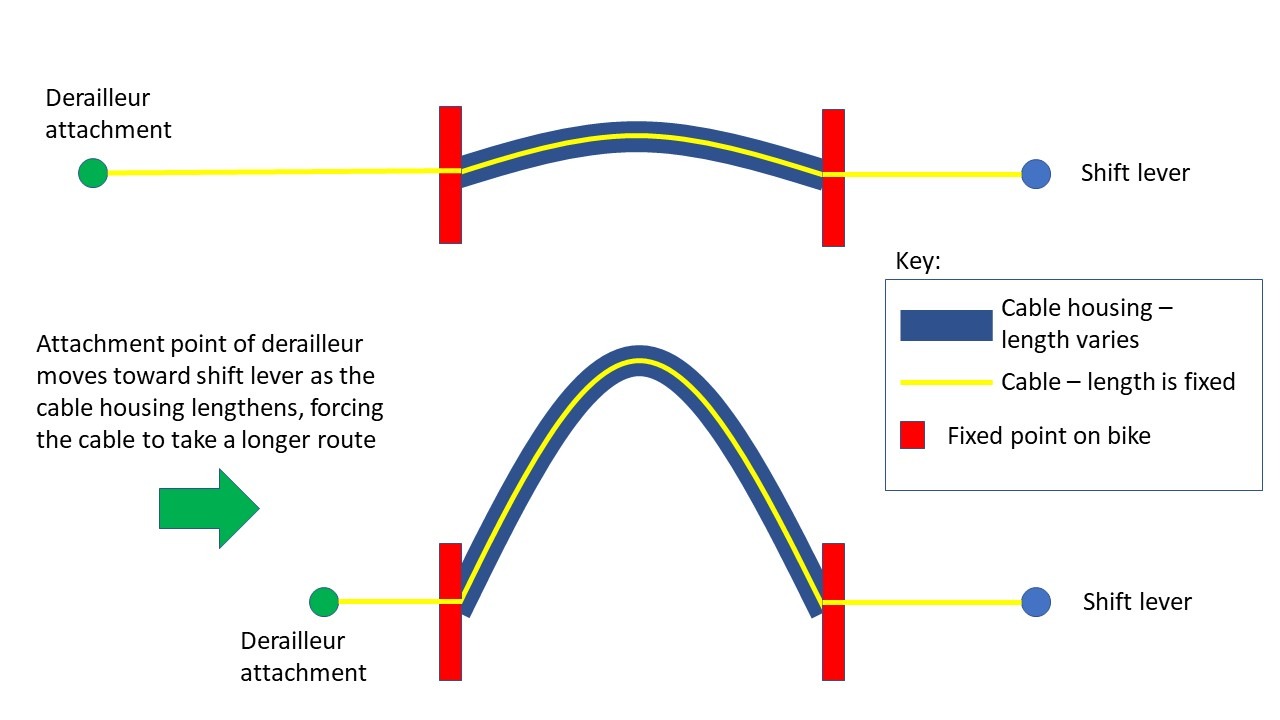
Barrel adjusters save the day
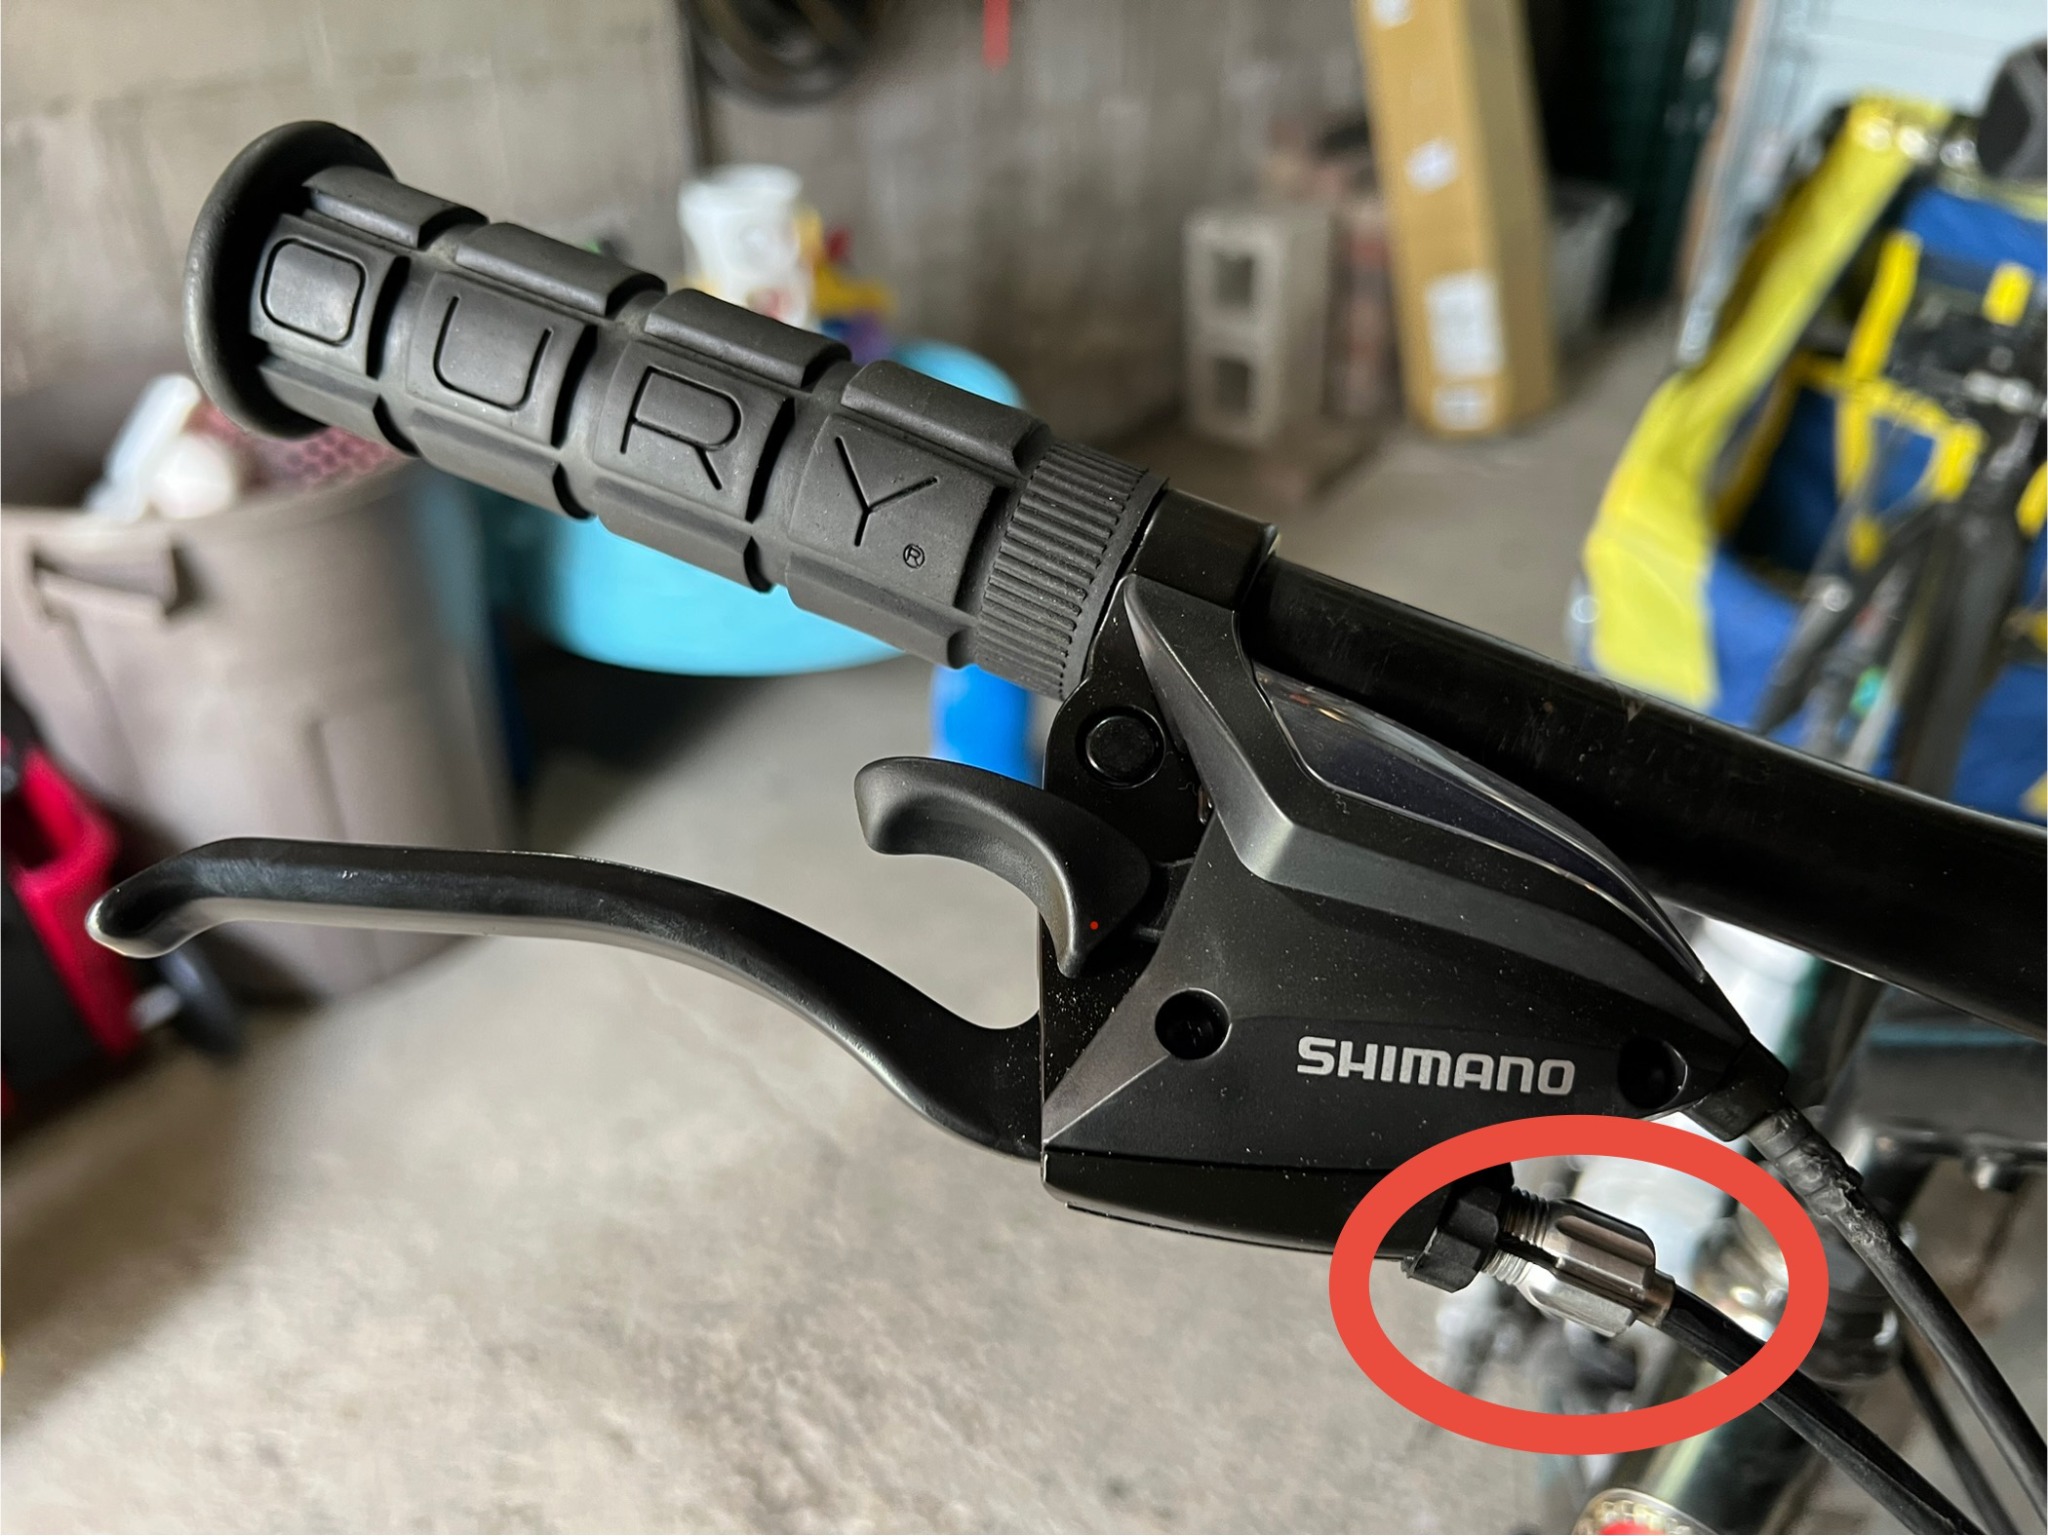
I installed and reinstalled the new parts multiple times, but kept ending up with the same problem: My lines were too loose. Then, I realized that there were these things on the lines just outside the shift/brake units called barrel adjusters that could be used to adjust the tension of the cables. You can see them in the picture below.
If you turn the barrel adjuster counter-clockwise, it lengthens the cable housing, which pulls the cable tighter and increases its tension. This will make your brakes more sensitive. In other words, less movement will engage the brake pads sooner and you can brake more quickly, but could also brake too abruptly and in some cases even flip over your front bar.
If you turn the barrel adjuster clockwise, it shortens the cable housing, which loosens the cable and reduces its tension. This will make it so that you have to squeeze the hand brake longer and harder to brake. If the cable is too loose, you might not be able to stop quickly enough in some cases.
It was here in this moment that I realized that bicycle mechanics are all about balance. No cable, screw, clamp, or derailleur can be too tight or too lose, nor too far to the left or right, etc. There is a middle ground for everything, and when you find this balance, that is when all these interconnected parts operate smoothly.
Clean rims with rubbing alcohol
After installing the new lines, I tested out the bike. All worked well except the brakes were squeaky. I cleaned the wheel rims with isopropyl alcohol. This reduced the squeakiness, but didn't solve the issue completely. I think I need to replace the brake pads.
Vocab List #3: The Chain
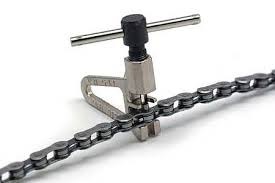
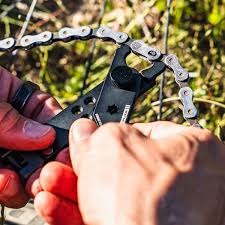
I also replaced the bike chain. First, here is a picture that shows the labeled components of a bike chain. After that are pictures of a bike chain tool and bike chain pliers, two tools that I reference in the next section.
Traditional riveted chains vs. Master link chain
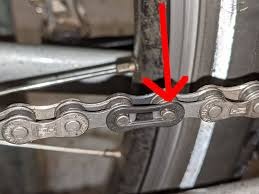
My previous bike chain was a traditional riveted chain. The entire thing was made of plates that were held together by pins, or rivets. To remove this type of chain, you have to use a bike chain tool to push out a pin/rivet somewhere, which will disconnect the chain at this point. The key, though, is to not push the pin/rivet out completely. You want to push it out enough so that you can unlink the inner and outer plates that it was holding together, but leave the end of it sitting in the hole of the outer plate so that it is easy to push back in when you want to reconnect the chain. The mistake that I made was that I pushed the pin/rivet out completely. I found it impossible to thread it back through the holes of the plates.
I learned that what I needed was a newer style of chain with a master link. The chain is still riveted because it uses the pins to connect inner and outer plates, but it will have one master link, which is a clip that can be easily disconnected and reconnected around a set of pins, making it much easier to remove and reinstall the chain. You just need a pair of pliers to squeeze two adjacent outer plates together in order to release the master link, and then you can easily clip it back on when it is time to reinstall it. After clipping it back on, you will likely have to use the pliers in a "squeeze-to-spread motion" to lock the master link back in place.
You can buy a new chain with a master link for $10-20. You can also buy a master link by itself to install into an older, traditional chain for even less. I just bought a new chain.
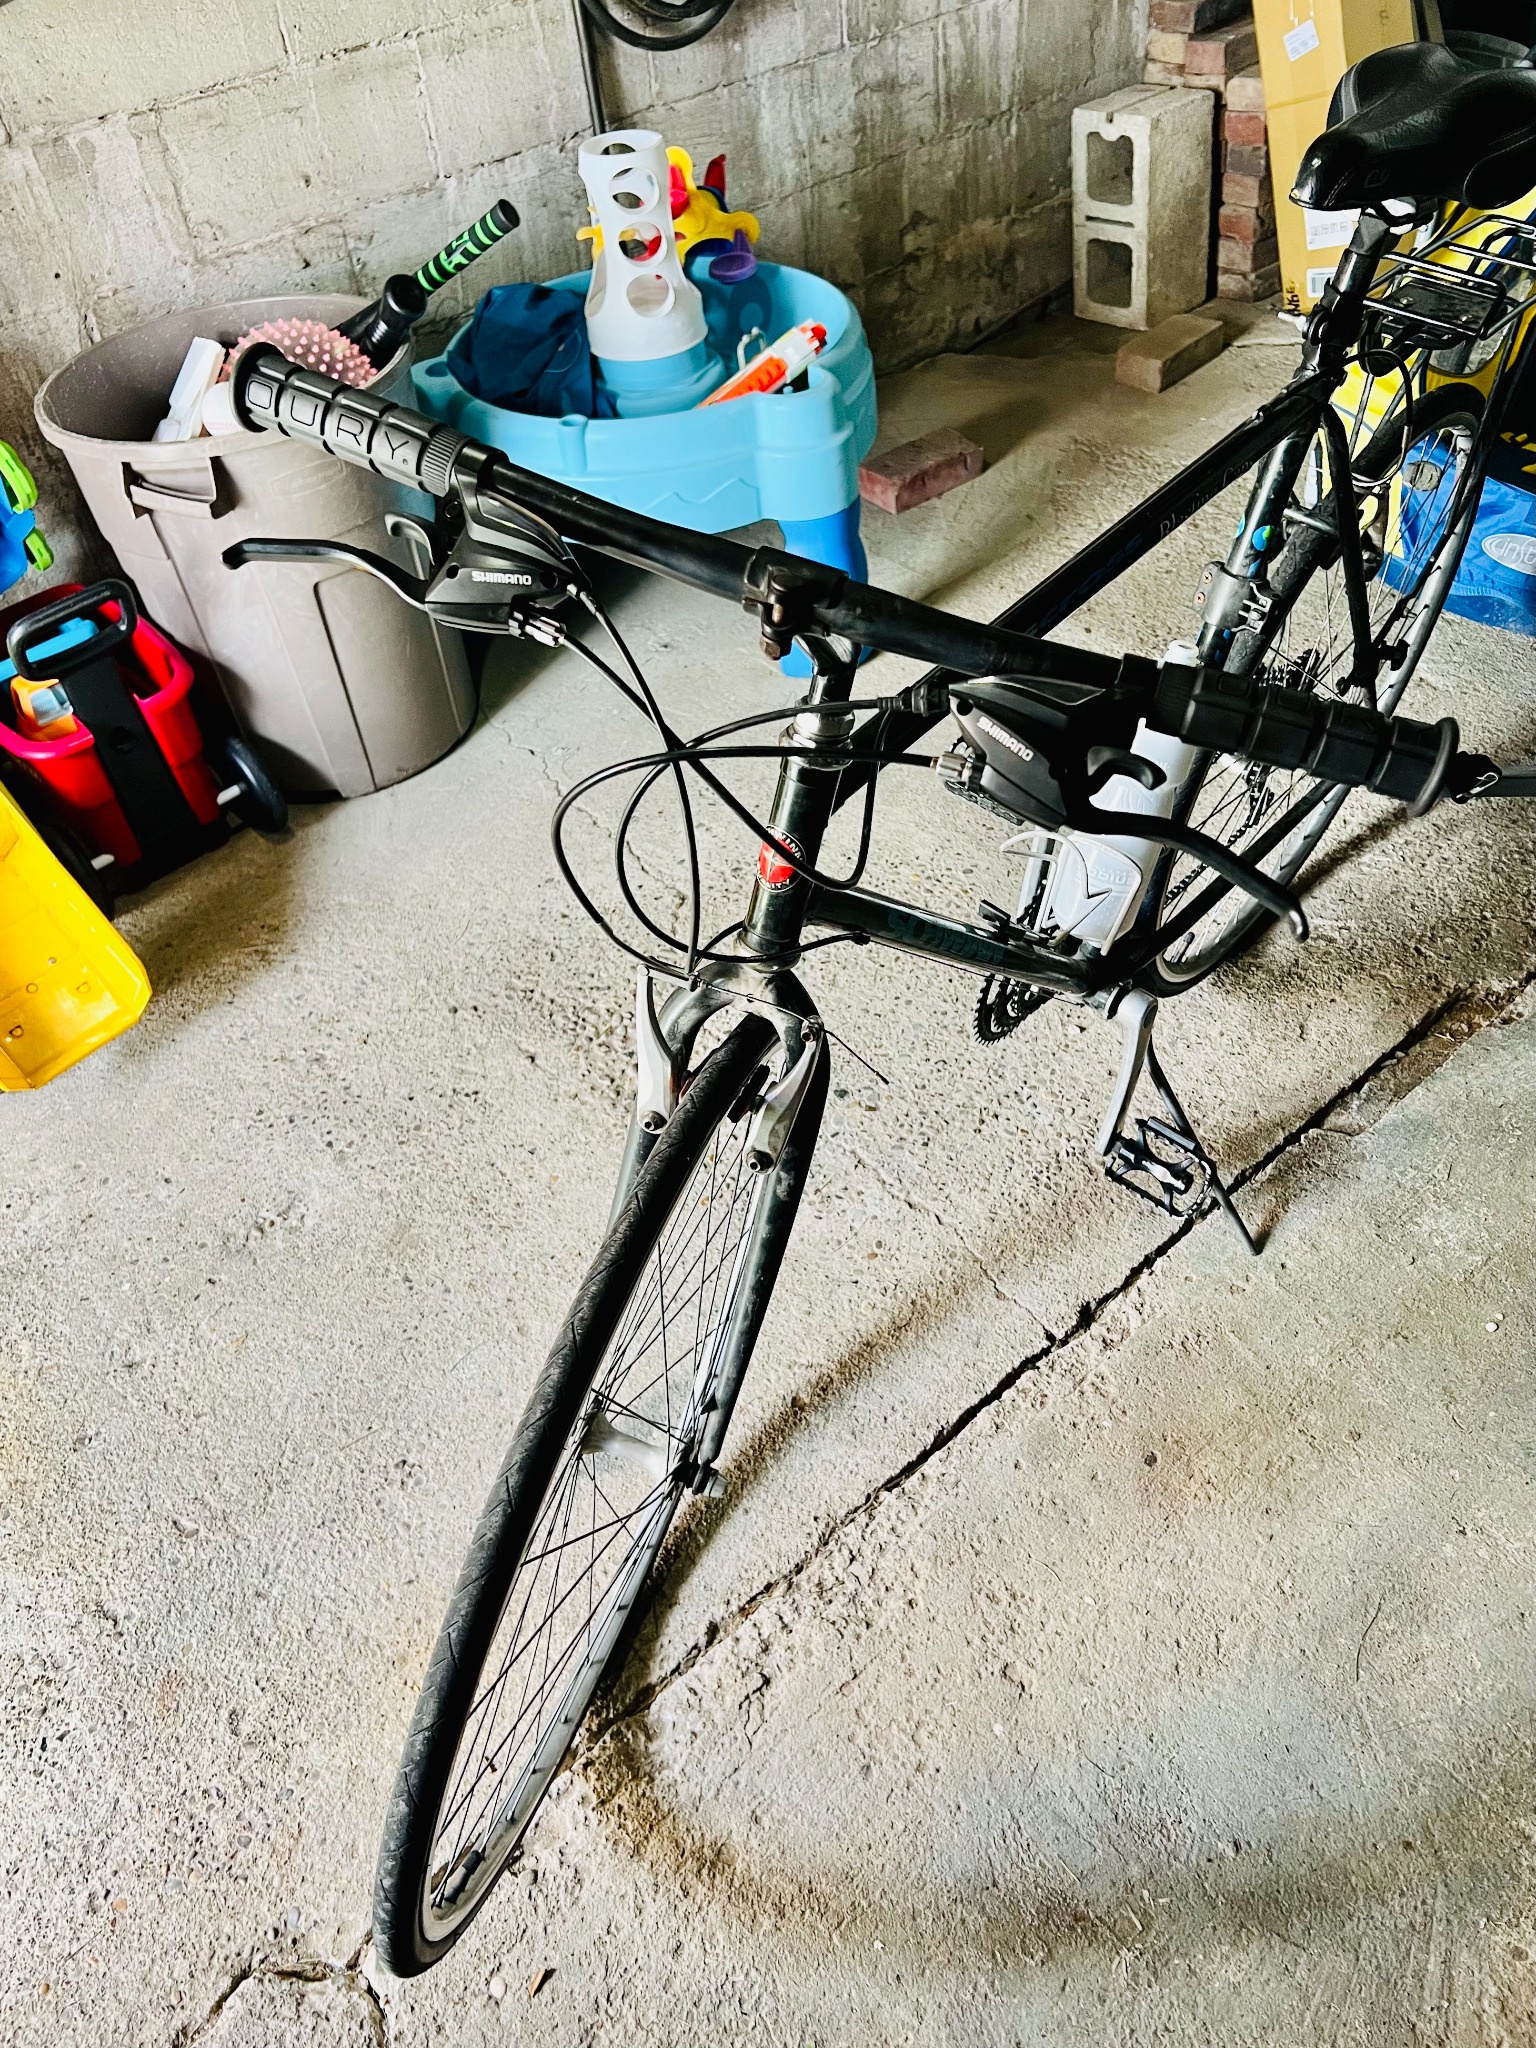
The updated bike
I stopped there. Here is a picture. That's all for this one!
Post a comment